Next step today is learning to create links. You can create links to other blogs or websites, or you can link back with one of your previous blog posts. Linking to your own blog is useful because it means you don't need to repeat or re-explain something.
So, here's how.
Step 1. Type whatever blog post you want you. When you link it is most useful to use words in the blog itself, rather than the actual address. For example I might write:
"I'm trying really hard to follow along with the lessons in Mrs. B's blog." Instead of typing "I'm trying really hard to follow along with the lessons in http://www.mrsbsteachingblog.blogspot.com/." Make sense?
Step 2. Highlight the word(s) you want to be linked. In the case above, I highlighted "Mrs. B's blog." You highlight by clicking and dragging your mouse over the words, so that a black rectangle shows up over the words.
Step 3. On the toolbar above click on the green circle thing (you know you have the right spot if the word "link" appears when you put your cursor over the green spot.)
Step 4. A box called "Hyperlink" will appear. Beside the URL (it already says "http://) type in the address of the link you want to make. Don't get rid of the http:// part! So if you wanted to link up with this blog you would type www.mrsbsteachingblog.blogspot.com after the http://. Then click "ok." You know it worked when you see your text change colour in you post. If you still don't believe that it worked, click on the link to see where it takes you.
Posting a picture.
So now you see that most of the tools you will need are on the toolbar above. I find it a bit easier to post the picture first, then to type after. But you don't have to do it that way. You will have the chance to decide where you want the picture to be located, and you get to choose the size. It helps to know what you want to post, first....
Step 1. Know what picture you want to post. If it is from your computer documents, you need to have the number etc. Click "Browse" under My Computer.

Step 2. Choose the photo you want from My Documents (depending on where you keep your photos, it might be in a folder in My Documents).
Step 3. Choose your layout (left, right, centre etc.) And choose your size.
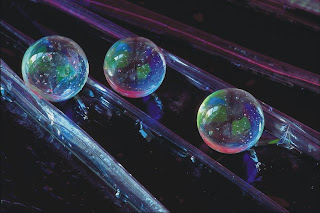
This one is posted "left/medium size." I borrowed it from the Macro Photo Competition finalists at Pioneer Woman.
Step 4. Sometimes you have to check the Terms of Service agreement. The click "upload image." And wait a moment until it uploads (be patient).
Step 5. Once it's uploaded you'll get a message. Then click "done."
Step 6. If the photo ends up in the wrong place you can click on it and drag it to where you want it. BUT, if you clicked left and you decided you want it on the right, it won't go there. It will go farther down or up on the left, but won't move to the centre or right. So if you don't like it on the left, you'll have to delete it (click the photo and use the delete key) and then start again.
Cool huh?

This photo was found on the Shared Directory of photos on the school server -- I don't know who took it, but I love the bubbles!


No comments:
Post a Comment